 |
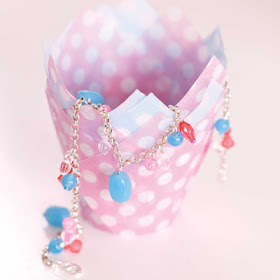
| Charming Bracelet by Dorothy Wood |
While it's still cold and wintry across most of the U.S., sunny February days bring with them hopes of warmer weather in the coming months. I find myself longing to ditch my dark, heavy wardrobe for lighter and brighter pieces, and handmade accessories like this delicate bracelet from the book 101 Ways to Stitch Craft Create are just the ticket!
Handmade flair is always a sweet way to transition your look through the seasons, and this project allows jewelry beginners to practice basic techniques such as using jump rings and head pins. Enjoy!
Charming Bracelet
By Dorothy Wood
What you need:
• Beads
• Silver lobster claw clasp
• Silver headpins
• Silver jump rings
• 50cm (20in) silver chain
How to create:
1. Cut a length of chain twice the circumference of your wrist plus 2 cm - 3 cm (3/4 inch - 1-1/8 inches) for ease. Using flat-nose pliers, open a jump ring and loop through a second jump ring and one end of chain. Close jump ring. Use another jump ring to attach lobster claw clasp to other end.
2. Sort beads into individual types, ready to attach eight small groups of beads along length of chain. NOTE: It is better to lay chain flat and attach beads to same side of chain so that they all hang attractively when worn.
3. Count out eight clear-faceted beads with loops. Arrange along chain so that they are equally spaced, attaching each one with a jump ring.
4. So that beads are mixed when chain is wrapped around twice, you need to attach beads in a fairly regular pattern to one half of chain, and then attach beads on other side in a mirror image. Arrange beads to your preference.
5. Repeat to attach other beads with loops again using jump rings. For beads with holes, insert a headpin, bend over at right angles and trim end to 7 mm (9/32 inch). Use round-nose pliers to bend into a loop. Open loop and attach to chain, then close loop again.
6. Check bead arrangement on your bracelet by wrapping chain around your wrist. Make any necessary adjustments.
Happy Crafting,
Shannon Miller
Editor, Stitch Craft Create

No comments:
Post a Comment