
By Katina Logan, Technical Artist for Martha Pullen Company
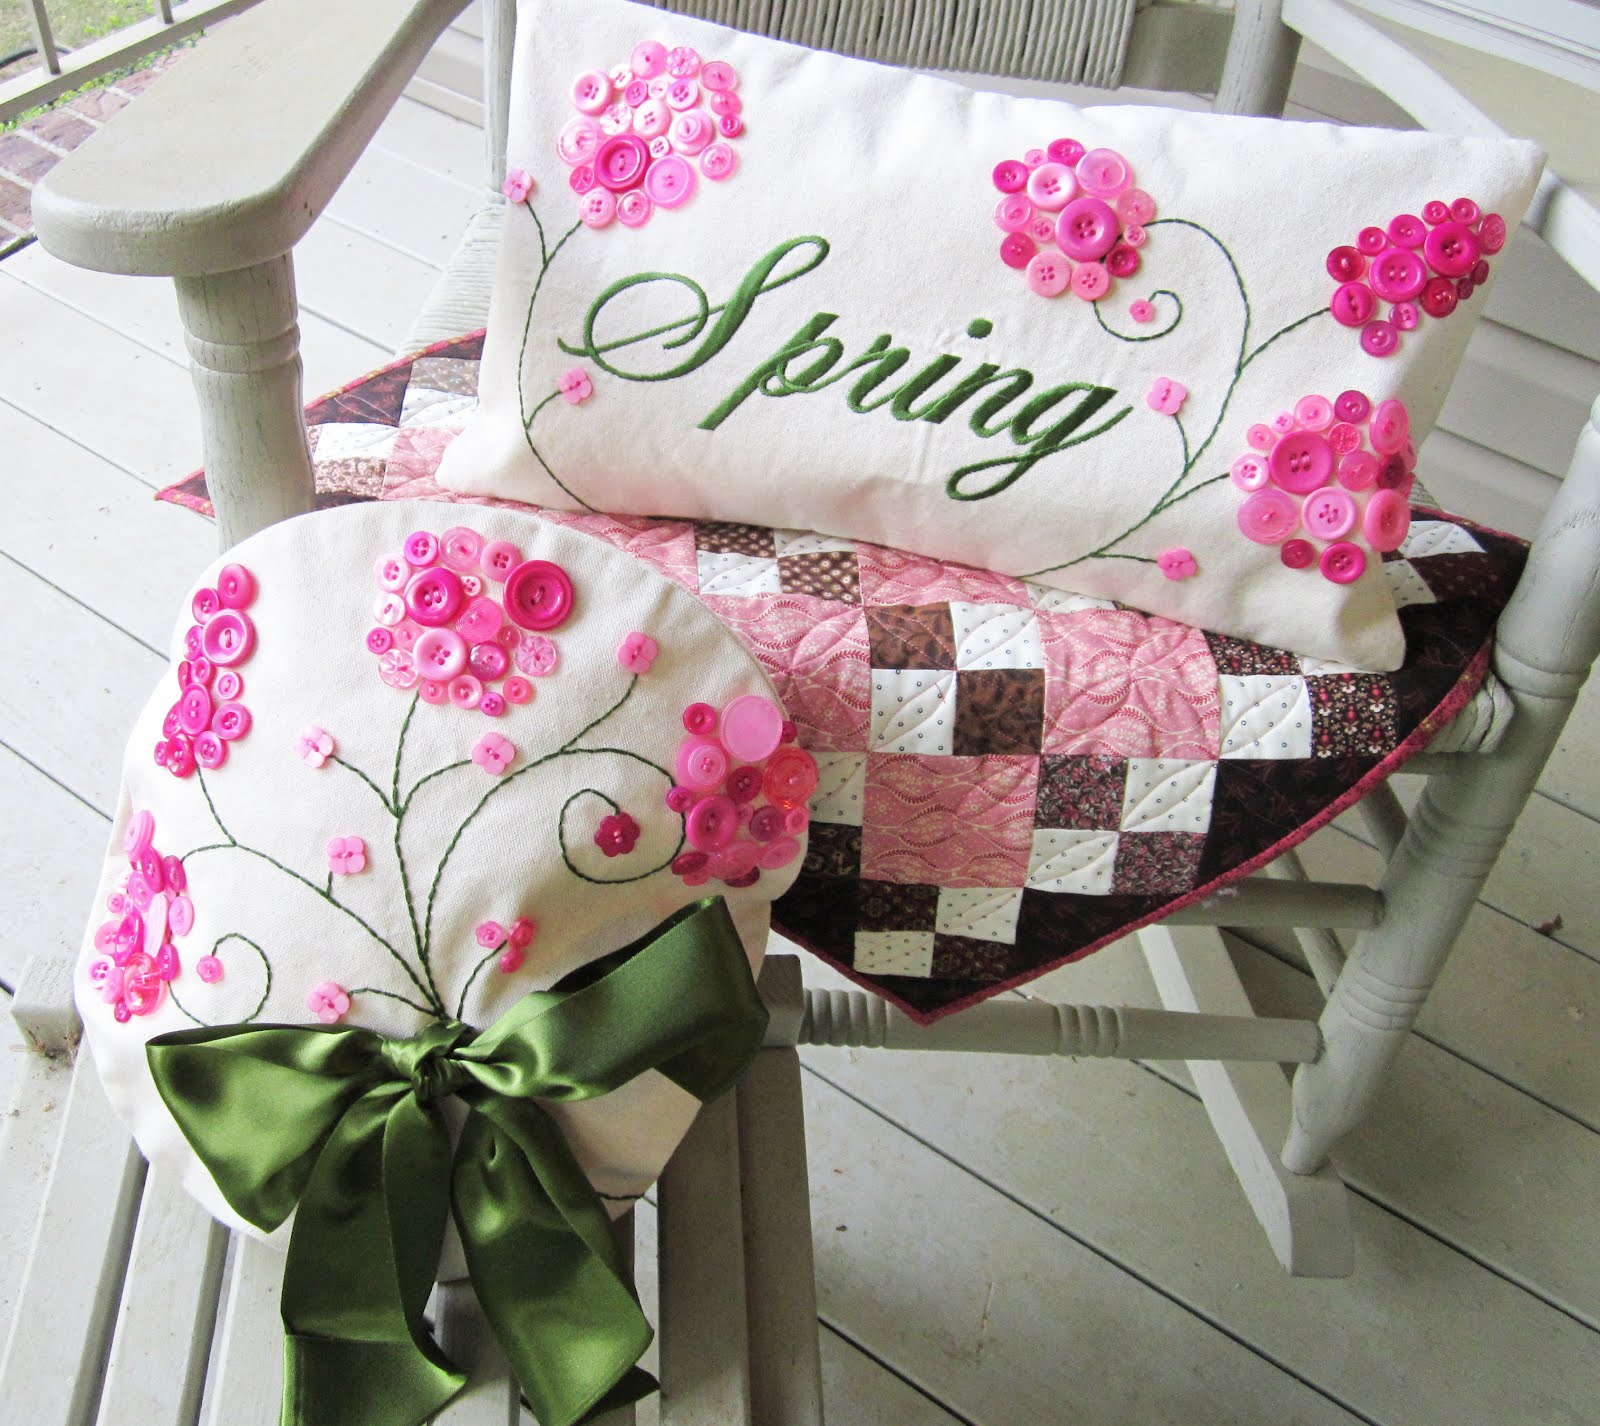
Spring has sprung! The sun is shinning, birds are singing, trees are full of leaves again and flowers are starting to bloom. Bring a little sunshine in to add a burst of color and a fresh new look to your décor with these easy-to-make, fashionable pillowcases.
Materials:
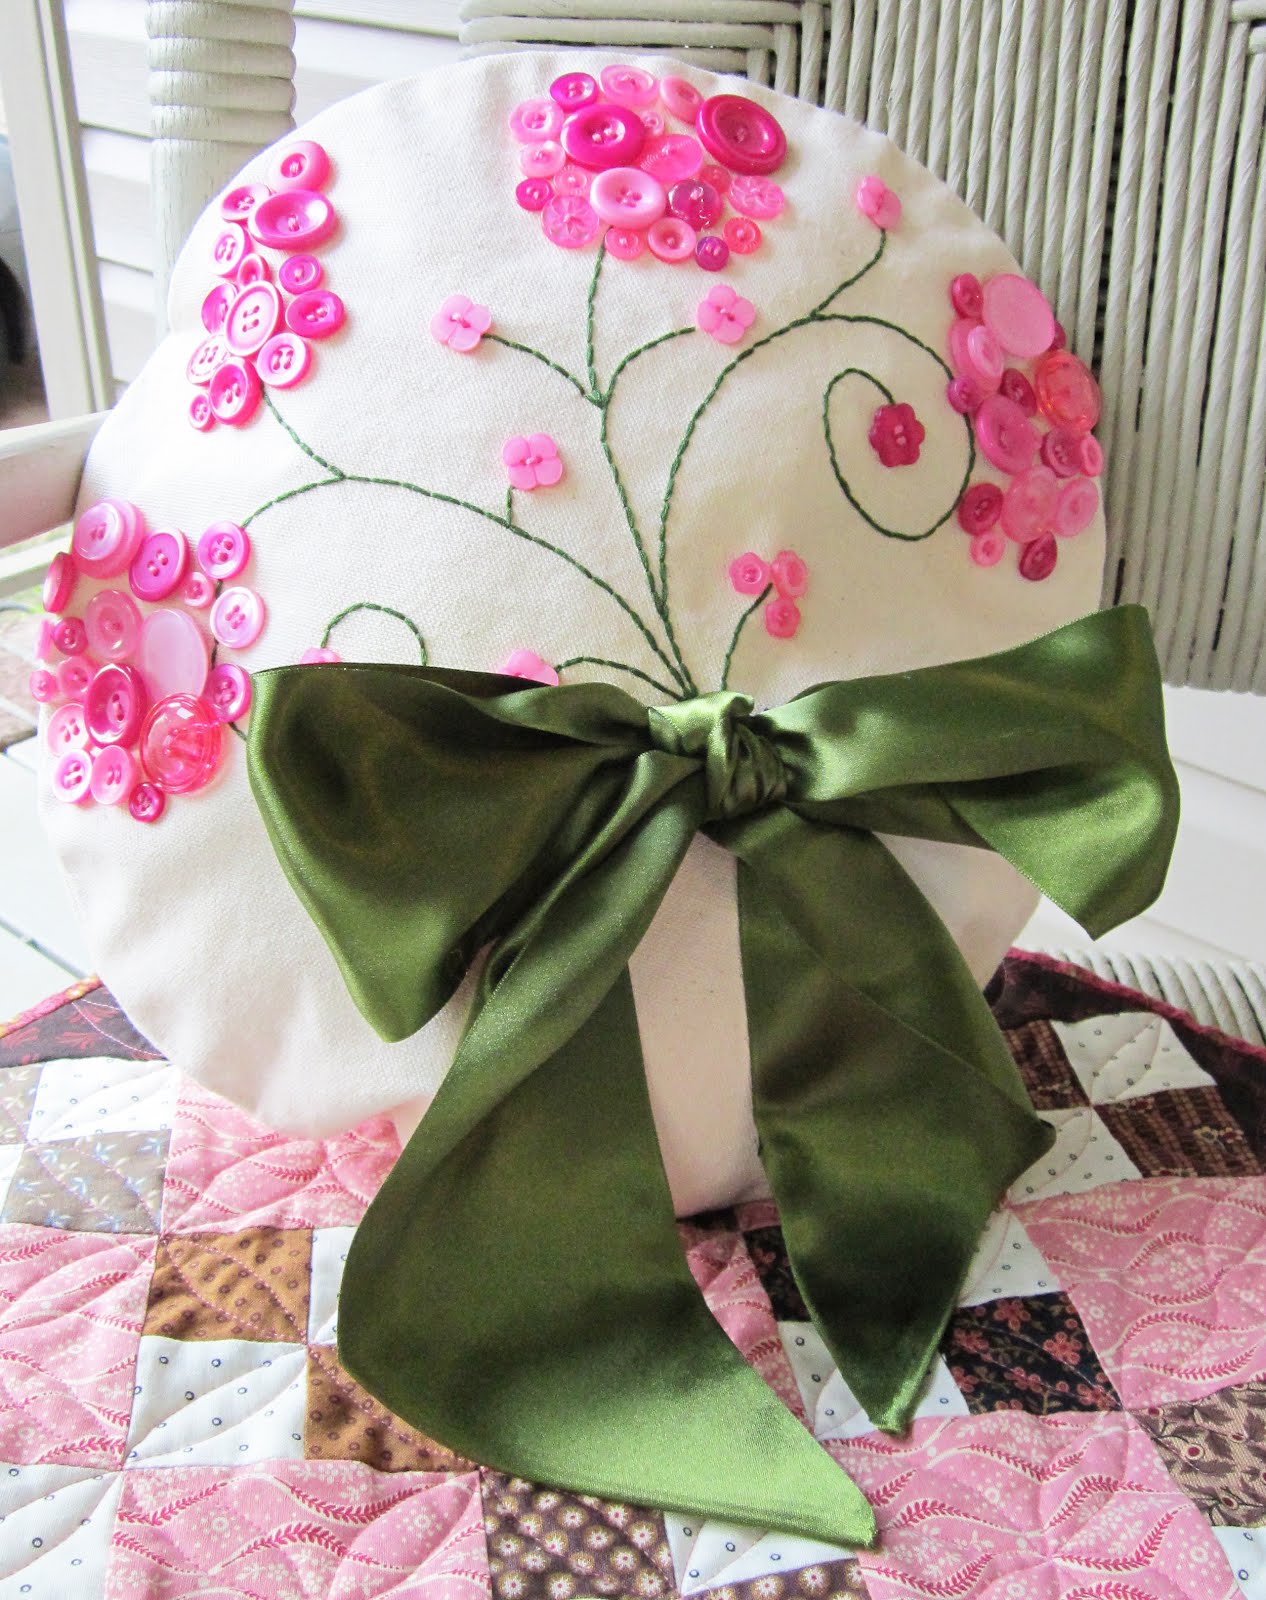
- Purchased 14" round and 10" x 18" rectangle canvas pillowcases (or, get creative and make your own)
- Raspberry Bulk Buttons
- DMC 6-strand embroidery floss, hunter green (stem stitch)
- DMC 6-strand embroidery floss, pink 6 (sew on buttons)
- White heavy duty thread (sew pillowcases back together)
- Green 3-3/4”-wide double-faced satin ribbon, 1 yard
- Large needle
- Water-soluble marker
- Stem/button placement templates (Click here to download and print out at 100%. Templates must be enlarged 200%, or to desired size.)
Instructions (Round Pillow):

- Trace the stem placement lines onto the center front of pillowcase. You can also trace the button placement, but keep in mind, the look and size may vary depending on the buttons you choose to use.
- Turn pillowcase wrong side out. Remove stitches from bottom half of purchased pillowcase. Removing the stitches will allow easy access when attaching the buttons.
- Turn pillowcase right side out. Using the green floss, stitch along the drawn stem lines using a stem stitch (see diagram above).
- Position buttons on the pillowcase to achieve your desired look. This step is helpful when using a variety of sizes.
- Set buttons aside in the order you positioned them in. Start stitching the buttons in place in the center of your flower and work your way outward.
- Repeat previous steps to complete the remaining flowers.
- To create the ribbons clean finished points; fold raw end up to meet the long edge, creating a point. Turn sewn point inside out. Repeat for other end of ribbon (see figures below).
- To attach the ribbon to the pillowcase; center the ribbon over the stitched stems where the stems intersect. Stitch a small square slightly beyond the side of the stitched stems (see figure below).
- Tie ribbon into a bow.
- Turn pillowcase wrong side out. Sew the pillowcase back together where the stitches were removed earlier.
- Turn pillowcase right side out. Insert a pillow form.


Instructions (Rectangle Pillow):
- Repeat steps from the round pillowcase to mark stem and button placements, removing stitches and stitching the stems.
- After stitching the stems, skip to “Embroidery Placement”.
- After the embroidery is completed, continue following the steps for the round pillowcase to attach the buttons and sew the pillowcase back together.

Machine Embroidery Placement:
- Mark the embroidery center. Note: Embroidery is centered between the stems and not in the middle of the pillowcase.
- Hoop the pillowcase.
- Select your font, word and size. I chose the word “Spring” and used the font “Exclusive Script” found on my machine; the word measures 3" x 10". Be creative and use any word or phrase you desire!
- Embroider your design.
The possibilities are endless! Get creative; use different colors and sizes of buttons, fabrics and words.

 Katina Logan is a technical artist for Martha Pullen Company. She creates with endless possibilities, as she is inspired by everything under the sun. She sees the beauty in everything, and loves breathing new life into something old. Outside of carpooling her little people around (FULL TIME JOB), dancing, and daydreaming, she spends a lot of time repurposing old clothes and furniture - you name it. She knows that being a creative spirit is awesome! (Katina is pictured with her son, Marc, and her daughter, Jasmine.)
These are beautiful! I'm going to pin them so I can make them later!
ReplyDeleteBeautiful!!! I like them...!!!
ReplyDeleteHow beautiful are these?? Definitely on my "to do" list. :-)
ReplyDeleteSo glad you like them, all! Be sure to share pictures of yours in our Flickr pool after you make some! :)
ReplyDelete